Last updated: 1 October 2026 · By Team Tilesminds
The easiest way to build with magnetic tiles is to start with basic shapes: six squares become a cube, and a square with four triangles becomes a pyramid. With those two shapes you can then make houses, towers, castles, garages and bridges.
In this guide you'll find magnetic tile examples from easy to difficult, with steps for each project, plus tips for going from an idea to your child's own creation together. The examples use magnetic tiles; there are separate ideas for magnetic blocks too.
In short
- Start with basic shapes: the cube and pyramid are the building blocks for almost everything.
- From easy to difficult: cube → house → tower → garage → bridge → castle.
- Wide base: the wider the bottom, the higher you can build.
- From idea to creation: decide together what to make, build it in steps and then give it a story.
Contents
- How do you build with magnetic tiles?
- 8 magnetic tile examples
- Building ideas with magnetic blocks
- From idea to creation in 5 steps
- Setting up a good building area
How do you build with magnetic tiles?
Magnetic tiles have magnets in their edges. Hold two tiles edge to edge and they click together. You can build flat (on the floor) or upwards. A few basic rules:
- Start flat. Lay a shape on the floor and fold the edges up: that naturally creates a tray or a cube.
- Squares for walls, triangles for roofs.
- Wide at the bottom, narrow at the top. That way a tower stays up better.
- Build calmly. Don't press; let the magnets do the work.
8 magnetic tile examples
1. Cube (from age 3)
- Lay one square flat.
- Click a square onto each side so you have a cross shape.
- Fold the four sides up.
- Put a square on top as a lid.
2. Pyramid (from age 3)
- Lay one square flat.
- Click a triangle onto each side.
- Fold the four triangles up until the points meet.
3. House
Build a cube without a lid and put a pyramid on top as the roof. Leave out one side as a door.
4. Tower
Stack cubes on top of each other and finish with a pyramid as the point. Is the tower getting wobbly? Build a wider base of two by two cubes at the bottom.
5. Garage
Stand two rows of squares upright side by side, with enough room for a car in between. Lay a row of squares across the top as a roof. Make several next to each other for a multi-storey car park.
6. Bridge
Build two pillars of stacked cubes and lay a row of tiles across them. A sloping row of tiles on each side becomes a ramp.
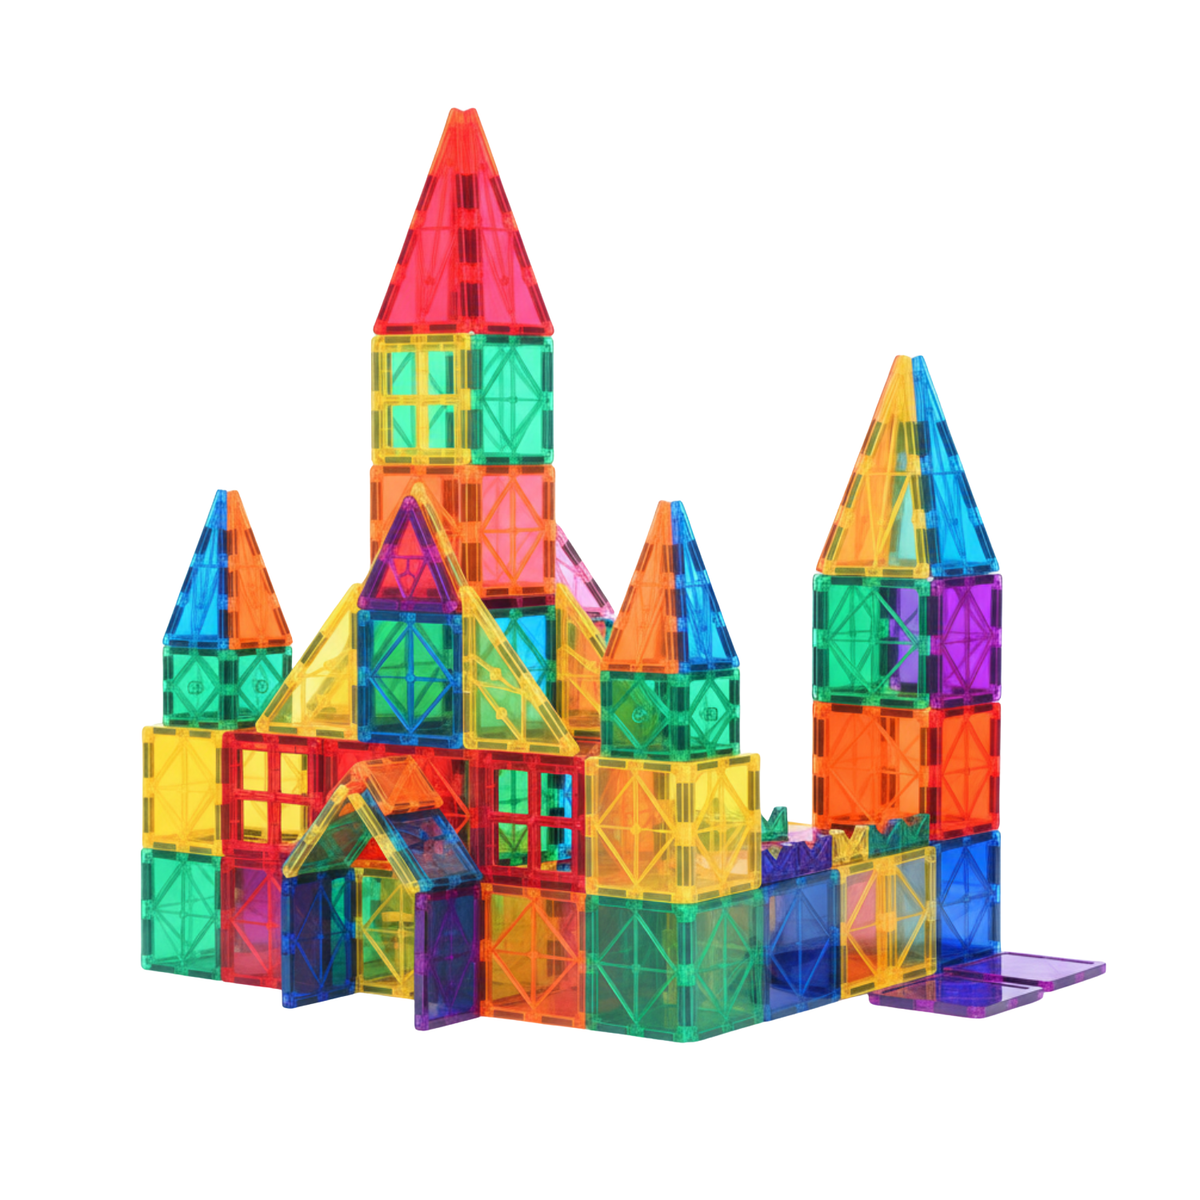
7. Castle
- Build four towers at the corners.
- Connect them with walls of squares.
- Leave an opening in one wall as a gate.
- Put pyramids or triangles on the towers as points.
8. Race track
Lay tiles one after another as a road, use triangles for bends and add a bridge and a tunnel. The full step-by-step plan is in Building a magnetic race track.
For the bigger projects, such as a castle or an entire town, you'll need quite a few tiles. With the Magnetic Tiles 64 Pieces (€29.99) you can start with the smaller projects; with the Magnetic Tiles 125 Pieces (€42.00) you have enough for a castle or several builds at once.
Building ideas with magnetic blocks

You build with magnetic blocks (little cubes) more like in a video game: block by block. A few ideas with the Magnetic Blocks 104 Pieces (Jungle) (€29.99):
- Tree: a trunk of wood blocks with a crown of grass blocks.
- Little house: brick walls, an opening as a door and a flat roof.
- Waterfall: a staircase of stone blocks with water blocks running down it.
- Island: a patch of grass blocks with water all around.
Read more about magnetic blocks in everything about magnetic blocks.
From idea to creation in 5 steps
- Come up with an idea together. Let your child choose: a castle, a farm, a space station, a town?
- Make a plan. What's going to be in it? A drawing with a few lines is enough.
- Start with the base. First the floor and the walls, then the details.
- Adjust as you go. Something falls over? Fine. Working out together how to make it sturdier is the part where the learning happens.
- Give it a story. Who lives there? What happens? Take a photo to show it off proudly.
Pro tip: Only help when your child asks, and ask a question (“What would help?”) rather than showing them how.
Setting up a good building area
- A flat surface: a hard floor or table works better than a thick rug.
- Enough space to leave the build standing for a while.
- A box or storage bag, so tidying up is simply part of it.
- Good light; transparent tiles by the window cast lovely coloured shadows.
Our tiles and blocks are made from non-toxic, recycled plastic, have strong magnets and are suitable from age 3.
Frequently Asked Questions
How do you build with magnetic tiles?
Hold two tiles edge to edge and they click together. Start with basic shapes: six squares become a cube, a square with four triangles a pyramid. With those you can build houses, towers and castles.
What can you build with magnetic tiles?
For example a cube, pyramid, house, tower, garage, bridge, castle or race track. Older children combine these shapes into an entire town or a design of their own.
How many magnetic tiles do you need?
For cubes, houses and towers, a set of around 60 tiles is enough. For big builds, such as a castle, or for building with several children, a set of 100 tiles or more is handy.
Why does my magnetic tile build keep falling over?
Usually the base is too narrow or it's standing on a soft surface. Make the bottom wider, build on a hard floor or table and put the heaviest parts at the bottom.